Initial Setup of CRM

HamaraCRM Help
Last Update há 8 meses
The initial setup of a CRM system involves configuring its basic settings and features to align with the organization's needs and requirements.
Here are the basic Steps to Follow:
- Control Panel Access
- CRM Access
1. How to Access Control Panel?
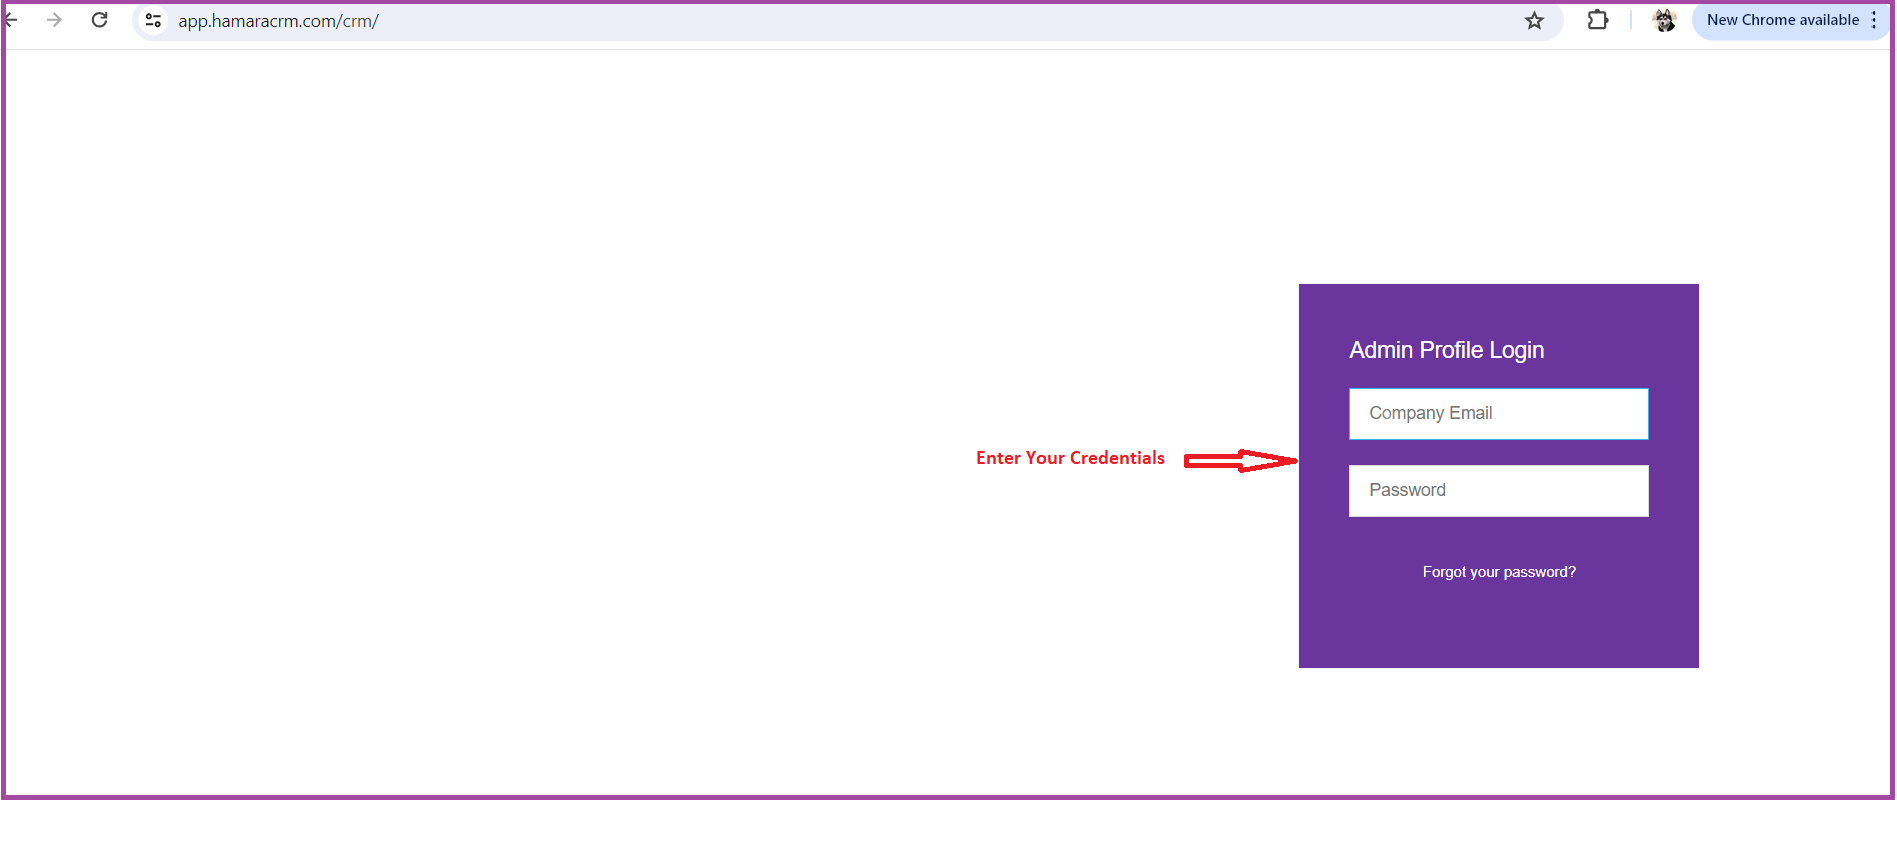
Step1: Click on the URL https://app.hamaracrm.com/crm
Step 2: Login with Shared Credentials
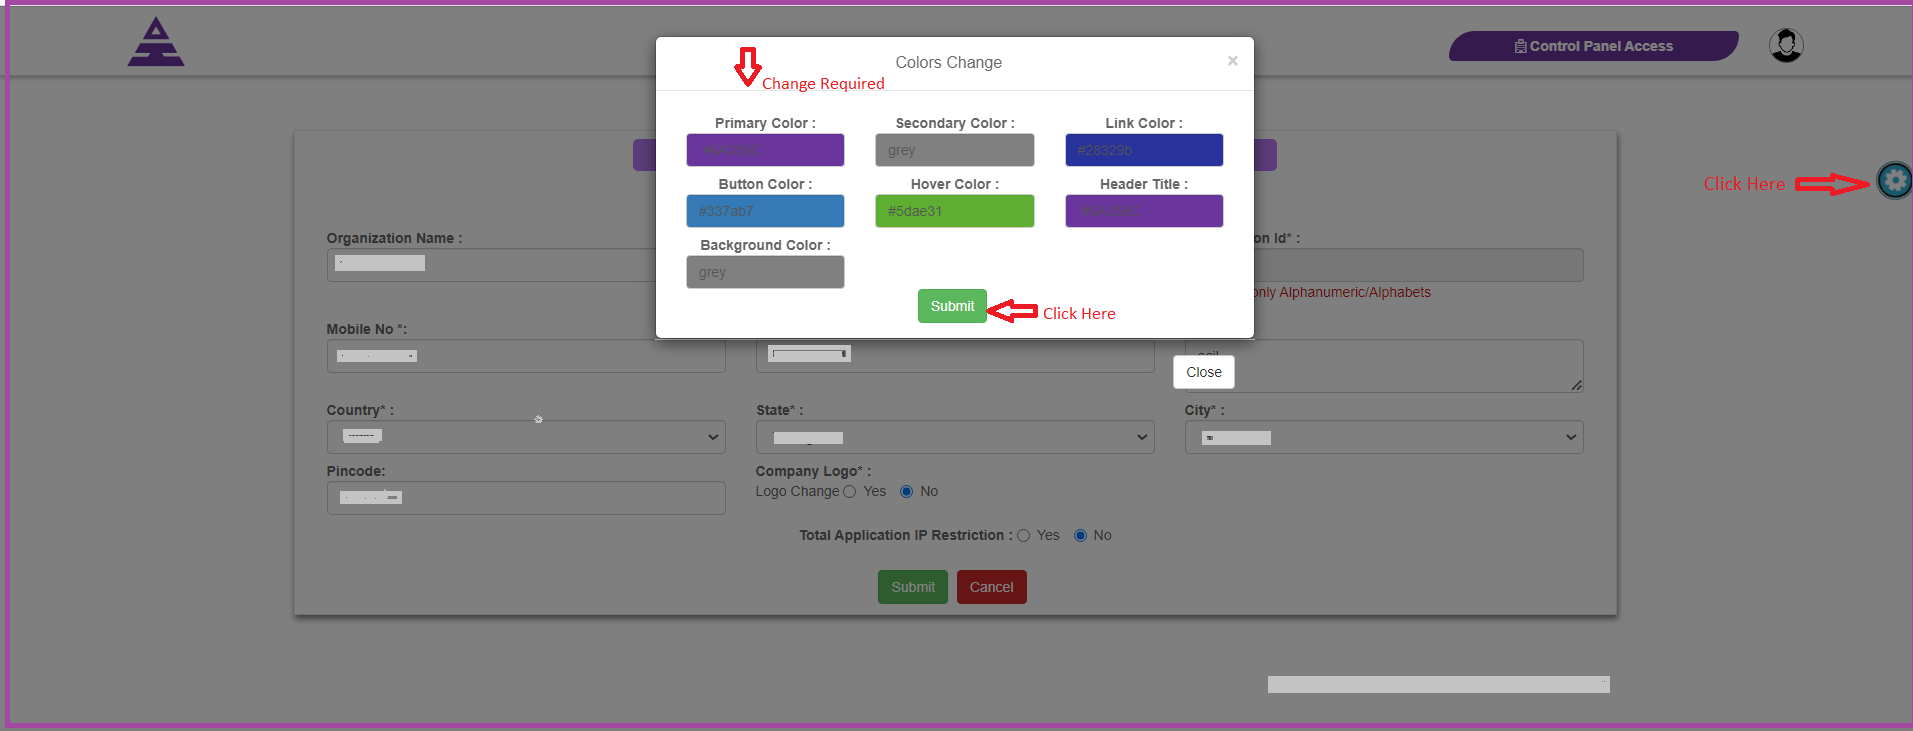
Step 3: Upload Company Logo
Step 1:Click on the URL provided in the email:
https://app.hamaracrm.com/crm. (or) https://urdomain.com/crm.This link grants access to HamaraCRM's webpage.
Step 2: Login with Shared Credentials
- Login using the Credentials that have been shared. This typically includes a UserID and Password.
- Enter these details into the appropriate fields to access the Control Panel.
Step 3: Upload your Company Logo
- Select "Logo Change" in Company Logo Field
- Click on "Choose File" to Upload image
- Click on "Submit".

In Additional Settings have an option of Global Color Settings. or Skip and Go to CRM Access.
*Global Color Settings:
- A "Global Color Setting" in a CRM typically refers to a feature that allows users to customize the color theme of the CRM interface across all users and modules.
- It enables organizations to establish a consistent visual identity within the CRM system.
- By setting global colors, administrators can ensure uniformity in the user interface, enhancing usability and reinforcing brand recognition among users
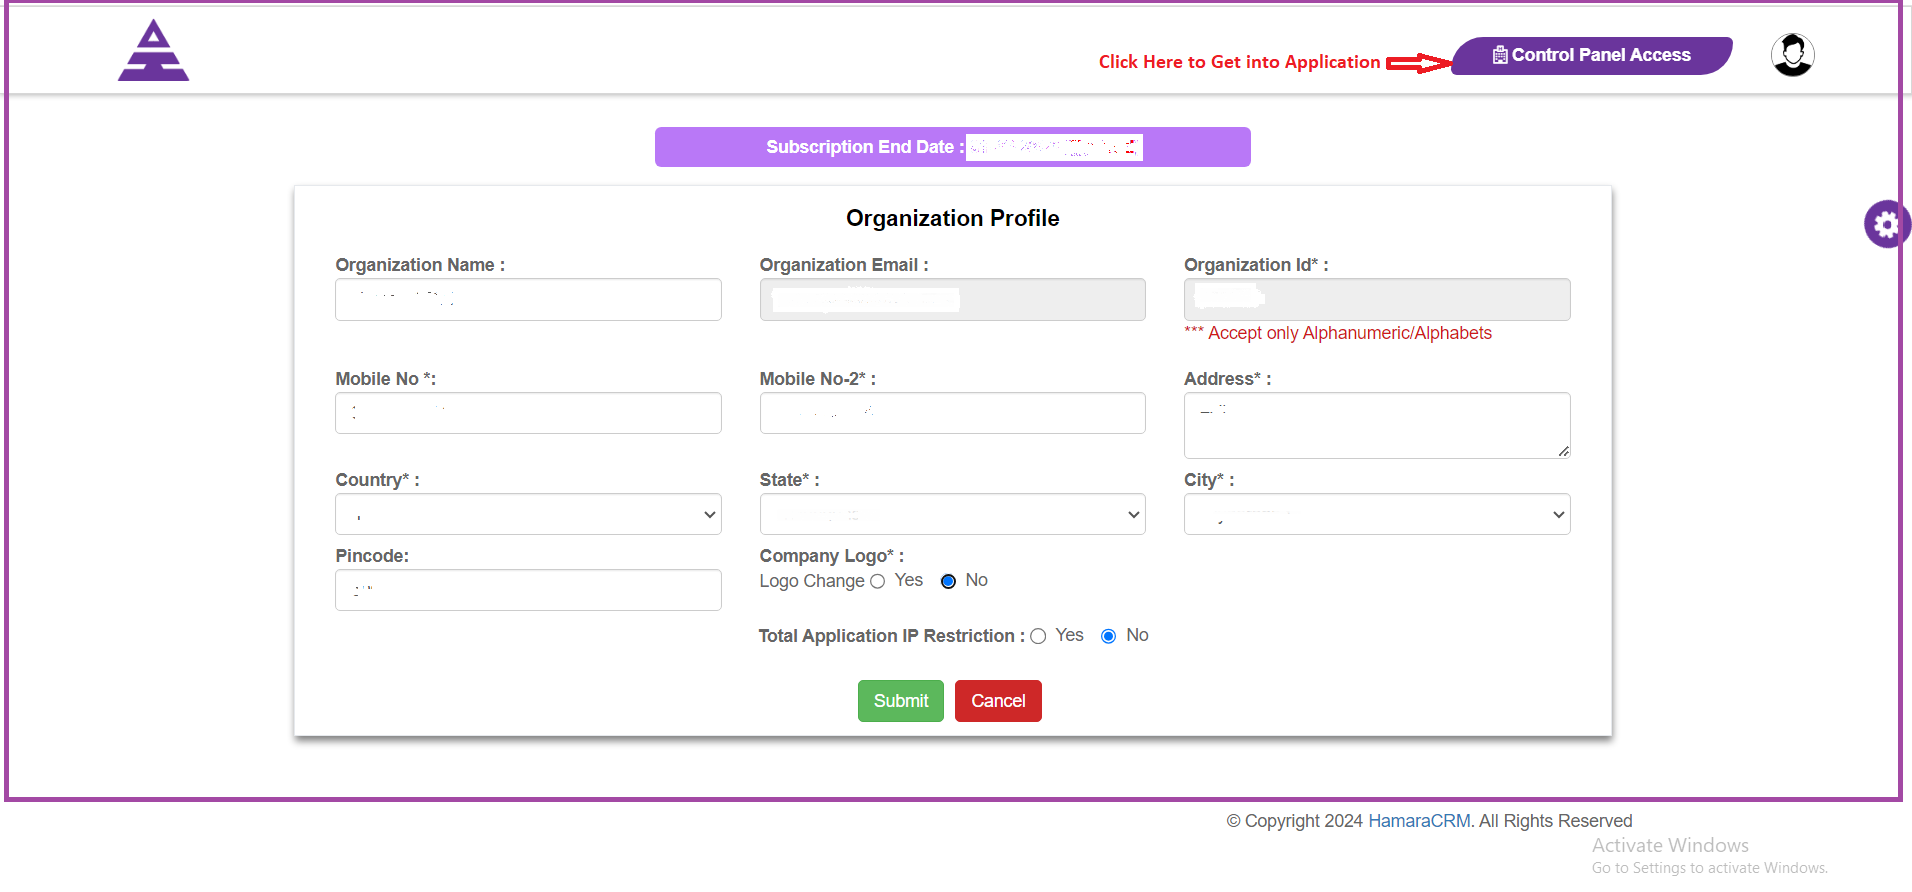
2. How to get CRM Access?
Step 1: Click on Control Panel to access the CRM
Step 2: Create Branch
Step 1: Click on "Control Panel Access" to access the CRM
Click on "Control Panel Access" to navigate to the CRM homepage.
Step 2: Create Branch
To create a branch, follow the steps below:
- Click on "Control Panel Access" upon entering CRM, then navigate to the Branch Pop-Up Indicator.
- Click "OK" on the Pop-Up Branch page to access Branch creation.
- Enter the required details for the New Branch.
- Click "Submit" to save the branch information.
- The Administrator's Branch allocation takes place during Branch Creation.
Conclusion: After the initial setup of the CRM system, the next step involves the process of scheduling appointments. This can be achieved by navigating through the Enquiry Form or any other necessary creation within the CRM.